I haven’t visited Petit Jean State Park in nearly six months, so I decided Presidents’ Day was the perfect time to make another trip. Since my wife and dog were accompanying me, I thought the Cedar Creek trail would be a nice trail for us to hike. I hadn’t been on that trail in several years, but I didn’t remember it being too difficult or steep.
We arrived at the trailhead, and the weather was perfect. The sky was cloudy, the temperature was in the mid-50s, and there was no breeze that I could feel. From a hiking standpoint, you couldn’t ask for finer weather.
From a photographic standpoint, the lighting was very soft and even, which made exposure relatively simple. But, it was also very flat, which isn’t photographically optimal. But, those were the conditions I had to work with, so I was going to do my best to work with them.
It didn’t take long for us to get separated, but it was my dog’s fault. I started down the trail. My dog decided he and my wife needed to stay in the parking area so he could thoroughly sniff something. A few minutes later, they caught up to me, and we went merrily along our way. Then, we got separated again; this time it was my fault. I saw something I wanted to take a closer look at while they continued on. Ahhh, that’s what it’s like hiking with the family, I suppose.
Having hiked this trail many years ago, I knew there was a bridge that crosses Cedar Creek. Having dealt with my dog and trail bridges in the past, I figured there was a very good chance that I would catch back up with them at the bridge. And, sure enough, I did.
About two-thirds of the way across the bridge, the wood had begun to rot, and there was a small hole in one of the boards making up the bridge. My dog had started across, saw the hole, decided the bridge wasn’t safe, turned around, and went back the way he came.
When I arrived, I tried everything to coax him across. He’s a heavy dog, and I really didn’t want to carry him all the way across that bridge. I was finally able to get him near the bad area where I could carry him over the rotted board, put him back down, and let him slink across the rest of the way. Had anyone been around to watch, they would have found it to be quite the spectacle.
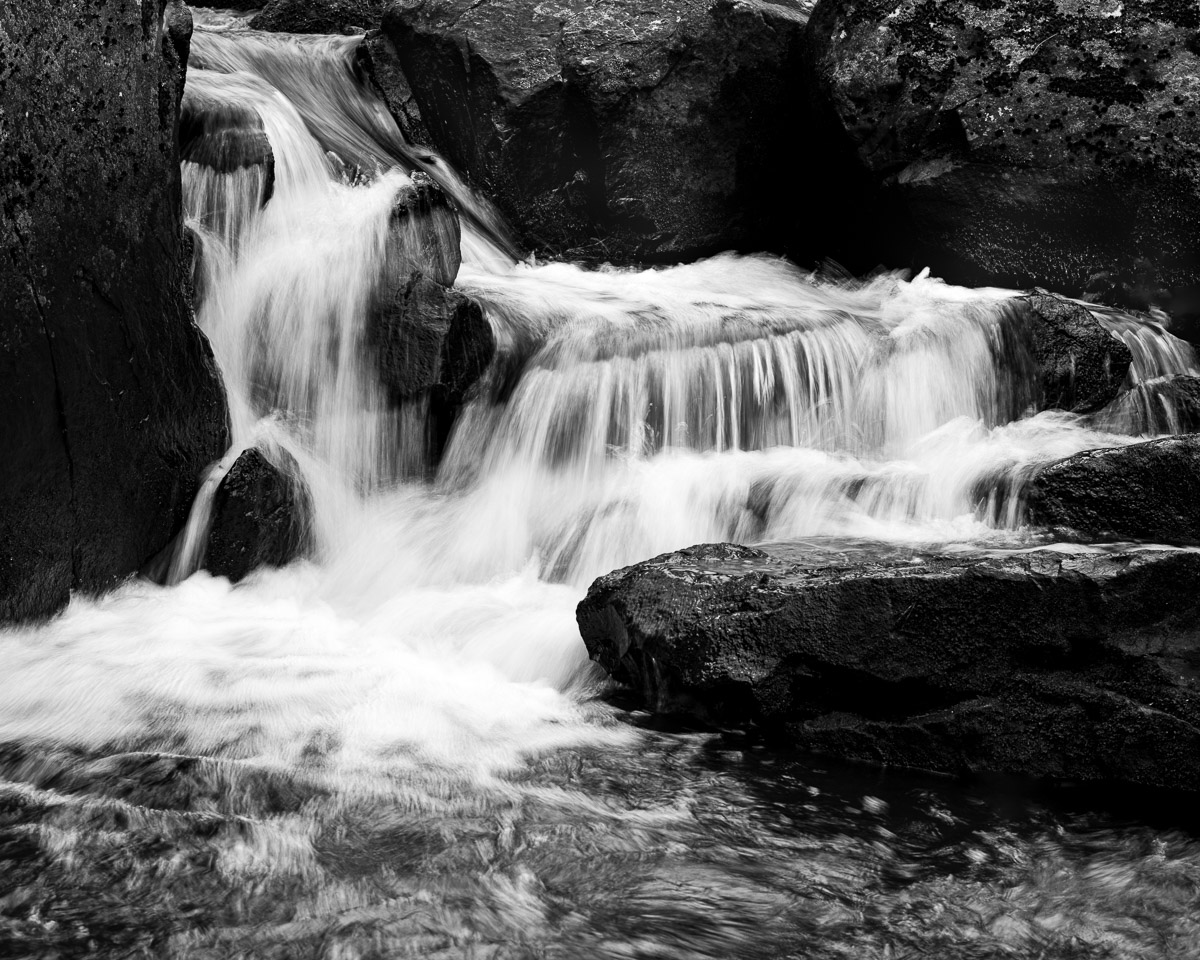
It was during this spectacle, though, that I noticed this small scene where the creek was flowing through some rocks creating a small waterfall. I grabbed my camera, tripod, and 24-70mm lens and began searching for the best position to photograph from. As it turned out, the best spot was on a small rock right in front of the scene, and I had to carefully scramble over several boulders to get to where I needed to be while trying not to fall or drop my camera.
After getting my tripod set up and positioned, I turned my attention to framing the scene. One of the main things I wanted to avoid was including much of the background creek and forest area as it seemed very cluttered and chaotic and really didn’t add anything to the image. Using a 66mm focal length eliminated that concern.
I was positioned about six to eight feet from the scene, and, with the focal length I was using, I knew my depth of field would be somewhat limited. At the same time, I did not want a very long shutter speed that would smooth the flow of water too much. I wanted the water flow to have a little bit of “edginess” to it. I also wanted to maintain my ISO at 100 to virtually eliminate digital noise.
Considering those factors, I selected an aperture of f/10 that appeared, using the camera’s depth of field preview button, to give sufficient depth of field. At my ISO setting of 100, that gave me a shutter speed of 1/10 of a second. With everything set, I pressed the shutter button and captured the image.
I also captured the image two more times. In one, I closed the aperture down to f/16, which caused the shutter speed to slow to 0.3 seconds, but the water flow was smoothed more than I wanted it to be. In the other, I left the aperture at f/10 but raised the ISO to 400 reducing the shutter speed to 1/30 of a second. This essentially froze the water flow making it look like river rapids; again, not what I was looking for. In the end, I liked the original image better than either of these.
When I opened the file in Lightroom, I immediately thought it would look better as a black and white image. So, the first thing I did when I began processing the picture was convert it to black and white. I then made several adjustments to increase overall contrast, which is always lost when converting from color to black and white. I had originally shot the image using a 4:3 aspect ratio, but I adjusted that to a 5:4 ratio which provided better framing for the scene. Then, I removed some bright blades of grass and some small twigs that I found distracting.
There were a few other distracting items I wanted to clone out, but Lightroom couldn’t do an adequate job, so I opened the image in Photoshop to complete that task. Looking at it again, I realized some of the background rocks were too dark, virtually black. To correct this, I opened Photoshop’s Adobe Camera Raw filter and used the brush function of the new masking feature (formerly known as the adjustment brush) to lighten those areas to bring out some of the rocks’ texture and to create this final image.
