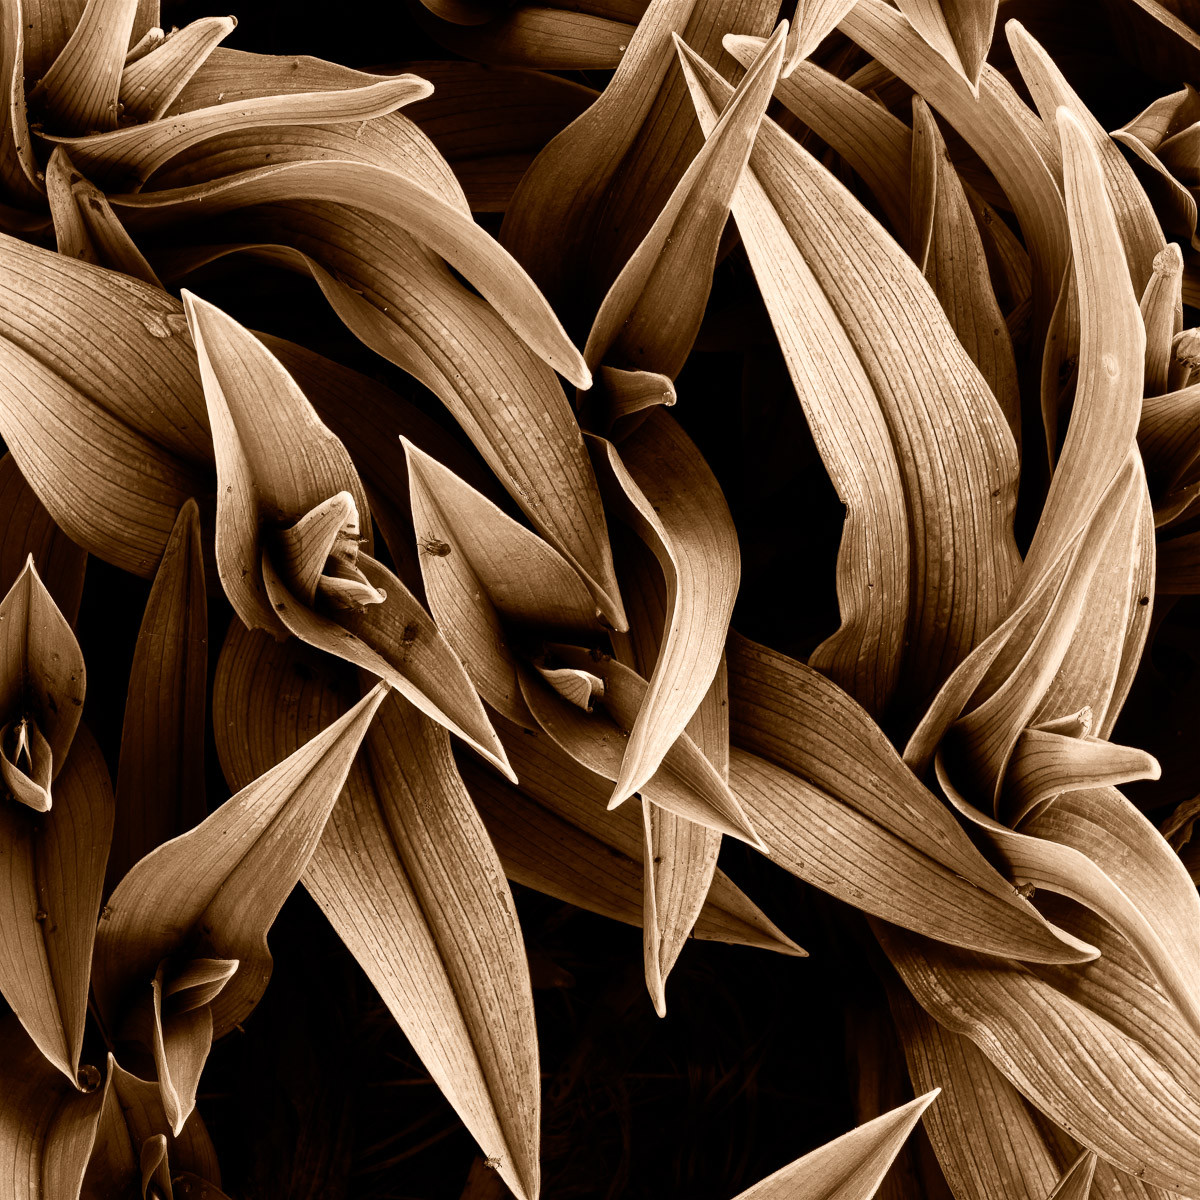
It’s a fact. Photographic subjects are all around us. But, when we see incredible images of amazing vistas captured in iconic locations, it’s so easy to forget this simple fact. What do I mean by “all around us?” I mean you can find incredible subjects in your town, on your street, or in your own backyard. Or, in the case of this image, right off your front porch.
A few days ago, I let my dog go outside for his morning bark at the neighbors’ chickens. After a while, I realized I hadn’t heard him in a while. Like a child, when he’s being quiet, it usually means he’s doing something he shouldn’t be doing. Stepping out on my front porch to figure out what kind of trouble he might be getting into, I happened to look down and see some green spring leaves just inches from my porch that had popped up seemingly overnight.
Studying the leaves, I was intrigued with the lines and curves they created. I quickly went back inside and got my camera and tripod. I knew I wanted the leaves to fill the frame, so I grabbed my 100-400mm lens. I headed back outside and set up my equipment. Then, it was just a matter of making several small adjustments to frame the scene just as I wanted. I also cropped the image to a 1:1 aspect ratio in the camera because it eliminated a lot of extraneous items on the edges of the frame.
Processing the file in Lightroom, I added some contrast and spent time adjusting the highlights and shadows. I wanted the focus to be on the leaves, but I didn’t want them to be so bright that they would be distracting. I also wanted the underlying grasses to be dark enough that they wouldn’t be noticeable.
I opened the image in Photoshop to sharpen it, but I was struck by how much the green color dominated the image to the point that the subject no longer seemed to be the curves and lines of the leaves but rather the color. While you expect lush green leaves in the early parts of Spring, I felt almost overwhelmed by it. That was certainly not the feeling I wanted to convey.
I considered reprocessing the picture to reduce the luminance and saturation of the greens. But, I thought that would have the same effect except this time, instead of overwhelming color, attention would be directed by the underwhelming color. Again, not what I wanted to achieve. I pondered the situation for a few minutes. Then, I began to wonder what would happen if I converted the image to black and white. So, I tried it.
Still in Photoshop, I had three two options for converting the photograph to black and white. The first option is to simply remove all saturation from the image. The second option is to use the menu option Image > Mode > Grayscale. This removes all color information from the file leaving you to work solely with shades of gray. The third option is to select the menu option Image > Adjustments > Black & White. This converts the photograph to black and white but maintains the color data which allows you to selectively lighten and darken various color tones.
One thing to keep in mind when converting an image to black and white is that, regardless of which of the three options is used, the image will lose contrast and look flat. But, that can be remedied by making adjustments to reintroduce the lost contrast, which I did.
Another benefit of using the Image > Adjustments > Black & White option is the ability to add a color tone to the picture. When using this menu selection, a box will pop up that gives you sliders to control individual color channels (reds, yellows, greens, etc.). Underneath the sliders is a checkbox you can use to add a color tone to the image. By checking this box, I was able to add a sepia-looking color tone to the leaves.
Finally, I sharpened the image using Topaz Labs’ Sharpener AI and then saved the final image.
One final note. As I was working to position my camera, my dog made his way back to the front porch. I have no idea where he was or where he came from or what he was doing, but he walked up trying to act like he had been a good, well-behaved boy the whole time. I’m pretty sure I don’t buy his story.
