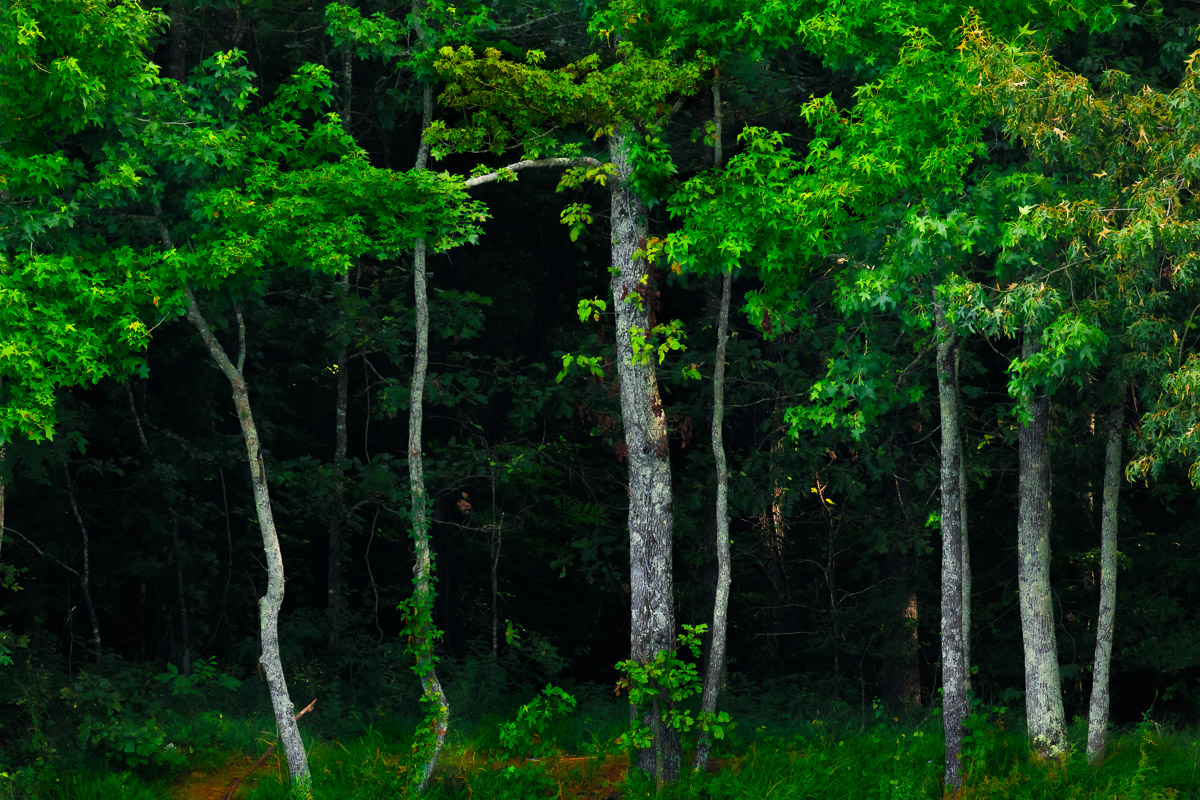
As I made my way home after my brush with insanity caused by the mosquito horde at Gator Pond, I drove by another small pond. Taking a quick glance, I noticed a small stand of trees on the pond bank. What caught my attention was the contrast between the trees’ light bark and the deep shadows of the background. I made a mental note to myself to come back the next day and photograph it.
The next morning I returned to the scene. For the image I wanted, it was critical to isolate the brighter tree trunks against the darker background. Since the scene was on private property, I was careful to find a location that provided the isolation I needed while being sure to not trespass.
With my tripod set up where I needed, I turned my attention to the exposure. Because of the considerable distance between my location and the subject trees, the aperture wasn’t much of a consideration from a depth of field perspective, but it was a consideration for the purpose of image sharpness. I was using my 100-400mm lens with a 1.4x teleconverter attached, which gave me a maximum aperture of f/8. I stopped that down by 2/3 of an f/stop to f/10.
As I set my aperture value, I began to notice that the wind had begun blowing. That added a new wrinkle to my plan. I normally shoot in aperture priority mode in which I set my desired aperture and ISO, and the camera determines the shutter speed to produce an even exposure. However, in this case, I needed a shutter speed that would be fast enough to freeze the leaf movement. So, I switched the camera to manual mode and set the shutter speed to 1/320 of a second.
Finally, I had to determine the ISO value to use to get the correct exposure. Typically, I set the ISO at 100 to eliminate as much digital noise as possible. However, with the scene being in shade and my aperture and shutter speed set where they were, I knew that 100 ISO would significantly underexpose the image. So, I manually adjusted the ISO to 2000, which, based on the histogram, would result in a slight underexposure. The underexposure would allow the background to go a little darker while preventing overexposure of the brighter tree trunks.
Once I was happy with the exposure settings, I pressed the shutter button and captured the scene. But, the work to create this final image was not over yet.
When I opened the file in Lightroom, the file had very little contrast, and everything seemed to blend together. That was definitely not what I had in mind. So, the first thing I did was use the tone sliders to increase the contrast to provide separation from the group of trees in the foreground and the shadow areas in the background.
Next, I focused on the colors in the image, especially the greens and yellows, which looked dull and flat. To address this issue, I used the Hue, Saturation, and Luminance sliders to enhance those specific colors. I increased both the luminance and saturation substantially. Using the Hue slider, I made a slight tweak to make the greens just a little darker and more lush, but I made a more significant adjustment to the yellows moving them closer to orange to separate them from the greens.
However, I still wasn’t quite satisfied because, after those adjustments, the leaves were now quite bright. What I wanted to convey was a sense of being deep in the woods where the sun is able to break through in only a few places here and there. If the leaves were bright, obviously the scene would not be in the deep forest. To address this, I made a series of targeted adjustments, using the adjustment brush, to reduce the highlights and overall exposure of only the leaves.
The need to use a higher shutter speed to prevent leaf blur from the blowing wind required the use of a higher ISO to ensure correct exposure. The higher ISO created a small amount of digital noise in the image that I found unattractive. So, my final adjustments was to adjust the Luminance noise reduction slider to remove that noise and to use the Detail slider to refine the details slightly. Finally, I used Topaz Labs’ Sharpen AI software to sharpen the final image.
